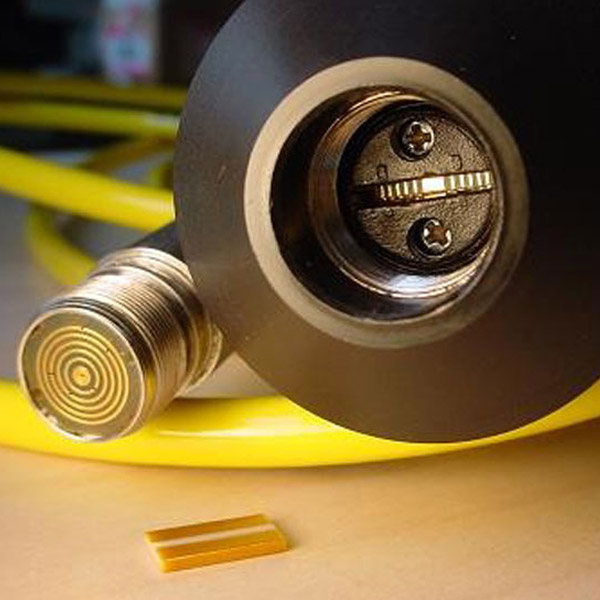
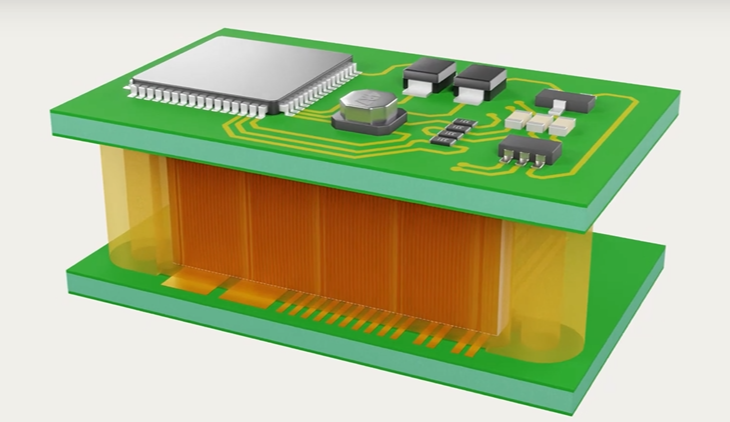
In the world of PCB assembly, every design decision matters, especially when it comes to connectors. Elastomeric connectors are a versatile and reliable choice for a variety of applications, from high-density interconnects to compact designs. To get the most out of these connectors, your PCB and housing assembly must meet specific design criteria. Here’s a detailed look at the key specifications and best practices to keep in mind.
Elastomeric Connector Design Considerations
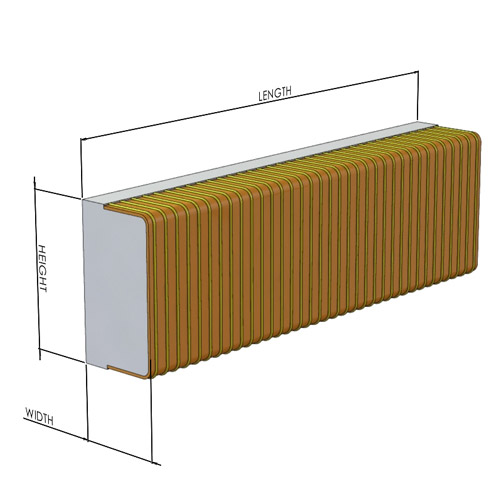
- Connector Length
- The length of the connector (Lc) is a function of the contact pad layout. To guarantee full coverage of the contact pads including any possible shifting, the connector length is generally .025” (0.64mm) greater than the distance from the edge of the first pad to the edge of the last pad.
- Connector Length (Lc) = (N – 1) Pp + Wp + .040” (1.0mm) where N = the number of contact pads, Pp = pad pitch, Wp = pad width.
- Connector Height
- The most critical dimension with respect to connector performance is height (Hc). Deflection in the z-axis or the height direction is essential to the functionality of an elastomeric connector.
- Z-Axis recommends that under worst case conditions, the connector is designed to allow for a minimum deflection equivalent to 5% of the connector height.
- Connector Height (Hc) = ((Board Separation + tolerance) / .95) + Connector Height Tolerance where .005” (0.125mm) is the default connector height tolerance.
- Connector Width
- To provide adequate contact area, the width of the connector must be large enough to guarantee that the connector will mate properly with the contact pads even under worst-case conditions. The minimum recommended connector width is .020” (0.5mm).
- Connector Width (Wc) = Hc / 2.5 (may range from 1 to 5)
PCB Design Considerations
No Soldermask Around Contact Pads
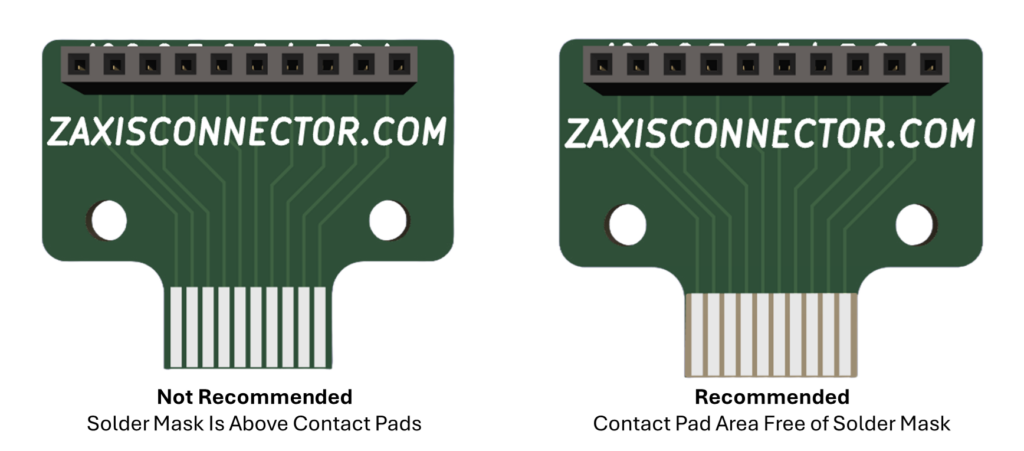
The contact pads are where the magic happens, enabling a seamless electrical connection between the PCB and the elastomeric connector. To achieve optimal performance:
- Bare Copper Finish: Ensure the pads are free of soldermask, exposing the bare copper. This minimizes resistance and maximizes conductivity.
- Pad Finish Considerations: Use finishes like ENIG (Electroless Nickel Immersion Gold) or hard gold plating to improve durability and prevent oxidation.
- Pad Size and Spacing: Maintain consistent pad dimensions and spacing, as uneven surfaces can disrupt connectivity. We recommend a 0.4mm pad spacing at the minimum.
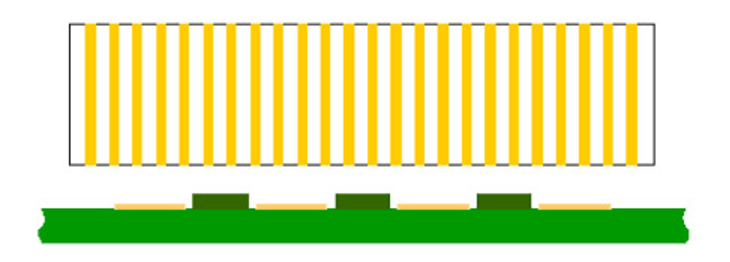
When the soldermask extends over or around the contact pads, it creates a barrier that prevents the elastomeric connector from making direct, secure contact with the pads. This can result in increased resistance and an unreliable connection, jeopardizing the performance of the assembly. The image below shows this issue:
Power vs. Signal Connector Geometries
The demands of power and signal connections differ significantly. Tailoring your PCB design to these requirements ensures optimal performance.
- Power Connections:
- Use larger contact pads to handle higher current loads.
- Ensure greater compression force for a solid connection.
- Consider wider traces leading to power pads to prevent overheating.
- Signal Connections:
- Use smaller, precisely defined pads to maintain signal integrity.
- Design for minimal cross-talk and impedance control, especially for high-speed signals.
- Avoid placing signal lines near power lines to reduce noise interference.
Single Row or Multiple Row Contact Footprints
The flexibility to design with single or multiple rows of contacts makes Z-Axis elastomeric connectors adaptable to different applications.
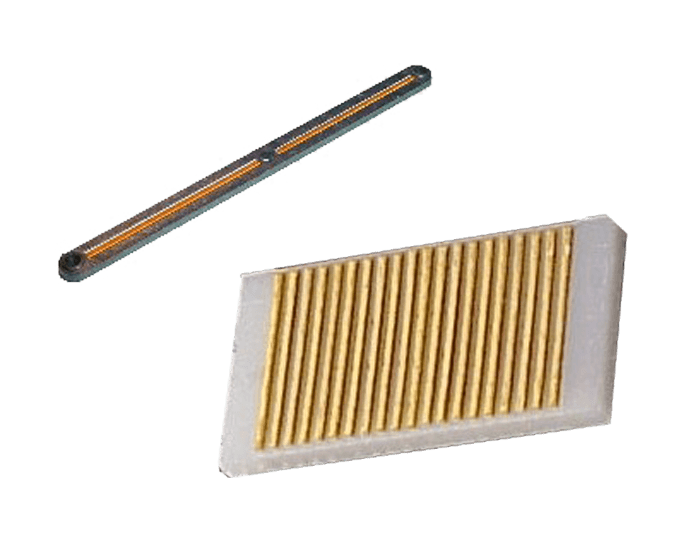
- Single-Row Design: Ideal for compact or low-density applications where simplicity is key.
- Multiple-Row Design: Suitable for high-density interconnects, optimizing PCB real estate while providing more contact points. Ensure precise alignment between rows to avoid misalignment during assembly.
- Design Tolerance: Account for manufacturing tolerances in your layout to ensure alignment under compression. Our standard connectors tolerance are 0.15mm.
Housing Considerations
Connector Housing
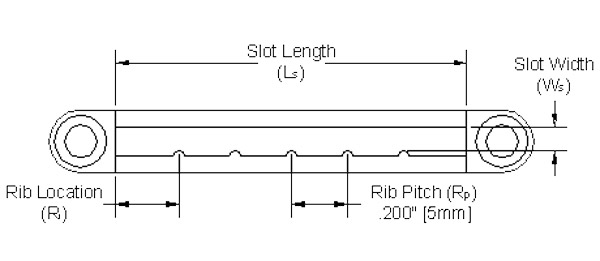
The housing is not just a structural element; it ensures the elastomeric connector maintains reliable contact with the PCB. Key points include:
- Material Selection: Use durable materials like high-temperature plastics or metals that can withstand environmental stresses.
- Alignment Features: Incorporate guide pins or alignment tabs to simplify assembly and reduce the risk of misalignment.
- Compact Designs: For space-constrained applications, opt for low-profile housings that minimize height without compromising functionality.
The connector housing may be used as a deflection stop for the mating substrates to accurately control deflection within the tolerance of the housing itself which is usually +/- .002” (0.05mm) or better. If this is possible, the slot height will be equal to your desired board separation.
Adequate Connector Pressure
Applying the right amount of pressure is crucial for reliable performance over the connector’s lifecycle.
- Compression Force: Refer to the connector datasheet for recommended compression values. Too little pressure results in intermittent connections; too much can damage the PCB or the connector itself. More details on compression force can be found here.
- Pressure Distribution: Use even compression across the connector to prevent uneven wear and ensure all contact points engage.
- Dynamic Applications: For connectors in devices subject to vibration, consider additional locking or reinforcement mechanisms to maintain consistent pressure.
Final Thoughts
Designing a PCB assembly with Z-Axis elastomeric connectors requires attention to detail and adherence to best practices, as with any design. By focusing on critical factors, you can ensure your design achieves peak performance. More thorough design guides can be found here.
At Z-Axis Connector Company, we bring years of expertise in elastomeric connector technology. Whether you’re working on high-density applications or seeking innovative interconnect solutions, we’re here to help. Contact us today!
